I've used the Canvas design page to demonstrate each stage but it can also be created on the machine itself.
Firstly open a new page in Canvas, choose a font, (I've used the one in the top right) and type the name you want in the text box. I use capitals so that the top and bottom of each letter is the same height.

Move the text to the top left hand corner of the page to check the height and width of the full name. Here I have made the name 8 inches wide, note that the dimensions given in the bottom left corner are for the size of the text box and not the word itself.

Move the name down and leave it in the centre of the page. Now choose the 'Basic' tab, in Patterns, and choose a rectangle shape. In this card I want the front to be about 5.5 inches tall and 8 inches wide. So take the height of the name off the 5.5 inches, in this case I am left with 4 inches. I want the name in the centre of the card so I need 2 rectangles of equal size, one above and one below it, so I divide the 4 inches in half giving 2 inches height to each rectangle.
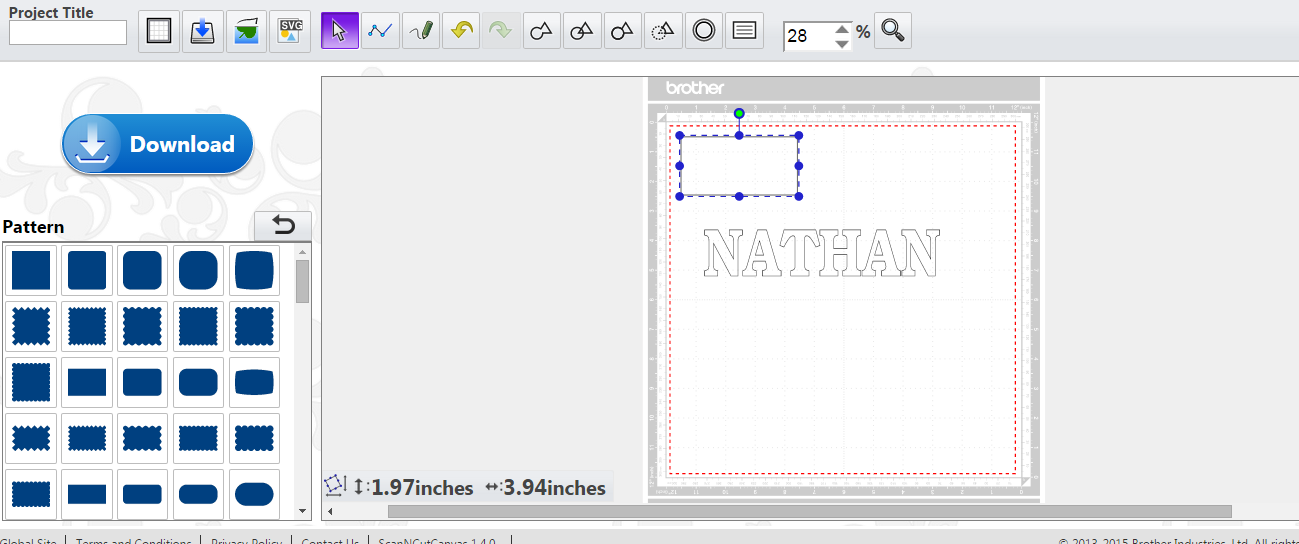
Open the 'Properties' tab and make the rectangle 2 inches high and 8 inches wide.

Drag the rectangle and place it under the name, move it upwards slightly so that it overlaps the name. Click on the rectangle, press and hold the shift key whilst clicking on the name box, in this way you select the 2 items. Click on the 'Edit' tab and select 'Align' then select 'Centre' to make the 2 items line up centrally.

Whilst the name and rectangle are selected click on the 'Weld' button, which will give you the picture below.

From 'Patterns' again choose a rectangle from the 'Basic' tab. Set the properties of the rectangle to again be 2 inches high by 8 inches wide.

Drag the new rectangle to sit above the name and just slightly overlapping. As before click on the new rectangle, hold down the shift key whilst you click on the name, to select both items. Whilst they are selected click on the 'Edit' tab, then 'Align', followed by 'Centre', to line them up and 'Weld' to join them together.

So now you end up with the card front with the name in the centre. The 'Properties' box shows the size 5.42 inches high and 8 inches wide.

At this stage I decided that I wanted the height of card to be just over 5 inches so I create the back of the card by making a rectangle of 5 inches tall by 8 inches wide.

As with the thinner rectangles move it to just overlapping the top of the name rectangle. Click on one rectangle, hold down the shift key and click on the other box to select them both, then choose 'Edit', 'Align' and then 'Centre'. Then whilst they are both selected click on 'Weld'

And here is the final pattern ready for cutting.

If the name is too short to reach the side edges I create a thin rectangle to fill in the space.

Move the rectangle to the left outside edge to check that the size is suitable.

When you're happy with the size, duplicate the shape so you have an exact match for the right hand side. Weld the shapes together by selecting the left hand small rectangle, hold down the shift key, then click on the name to select the 2 items. Click on 'Edit', 'Align' then left, to line them up followed by the weld button.

Move the second small rectangle to the right of the name and again click on 'Edit', 'Align' then 'Right', to line them up followed by the weld button.

I hope this explains the process so that you can do it yourself.