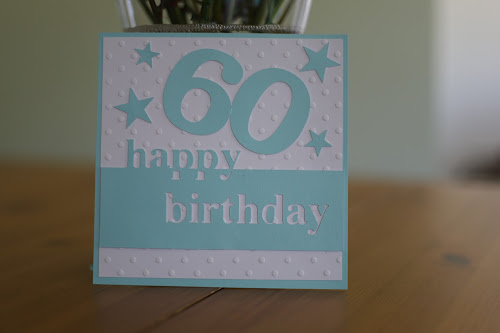
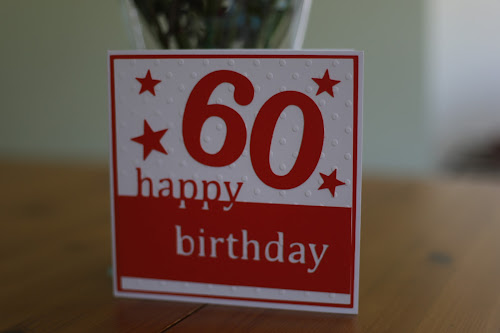
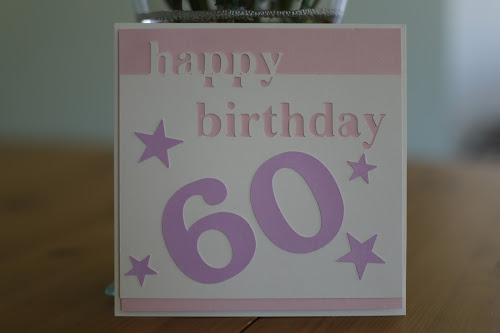
I used the off-line/download version, you can use the on-line version but the extra options at the end of the tutorial are a bit more difficult to do.
I got a bit carried away with 60th Birthday cards, the red one was for my husbands birthday.
Begin by opening the off-line Canvas Workspace.
From the basic shapes, choose a rectangle and set it on the page.
Set the dimensions as 5.5" wide and 1.80" high
At the top set the font as BCM PC Tennessee, I found this font works well with this style of card.
Right click on the word and click duplicate form the menu twice.
You now have the word 3 times.
One will be the top half of the word.
One will be the bottom half of the word.
The third one will be used to hep line up the other 2 correctly.
Drag one of the words so that it overlaps the top of the rectangle, it is going to be welded to the rectangle so all the letters need to overlap the top edge.
This is going to be the top half of the work.
Select the word and the rectangle and click weld.
Put a rectangle on the workspace and make it just a little wider than the word and about 0.03" high.
Place it over the 2nd word.
Set the top of it about the same position as the top of the larger rectangle is in relation to the first word.
Select the 2nd word and the thin rectangle, making sure that the rectangle is in front of the word, and click on 'Subtract'
This cuts the word into a top and bottom parts but they remain together.
Put a rectangle on the workspace and make it wider than the word and taller than the top section on the word.
Place it over the 2nd word, leaving just the bottom of the letters showing.
Click on 'Subtract'
So now we have the top of the word welded to the top of the rectangle (pink), and bottom of the word (red), then the word to be used to line everything up (blue).
The layers need to be:-
pink layer lowest
blue layer as the middle layer
red layer on the top.
Arrange the 3 layers on top of each other.
Click on the blue layers and drag it out of the way, leaving the red layer in the correct place.
Select the pink and red layers and click on 'Subtract', this will remove the red shapes from the pink rectangle.
Using the same font, add the text 'birthday' and place it on the rectangle.
Select both the rectangle and the word 'birthday' and click 'Subtract' to punch out the letters from the rectangle.
When you cut this out remember to keep the holes from the b,d and a in 'birthday' to stick on the card.
Alternatively you could use a stencil font to keep the holes attached.
Create a 5.5" square to set the border cut out onto.
For my card I typed the number 60 using Brussels font and enlarged it to suit the balance of the card.
From the basic shapes I used the 5 pointed star.
I duplicated the star 3 times to give me 4 stars and adjusted the sizes to suit the card.
Separate all the parts for cutting and send to your machine.
Alternative options
Longer topper
To make a different card front, first click on the layers tab on the right,
Click on 'snap to grid' and then set the grid spacing to 0.5".
This will help keep the lines straight.
Double click on the word border to expose the nodes.
With the nodes exposed click on one of the bottom corners and drag it down to make the topper longer.
Drag the other corner down to match and click off the topper.
Here's the new assembly with the longer topper.
Rotated topper
An alternative would be to rotate the topper, still keeping the 'snap to grid' function turned on.
Place the topper at the angle you want it to be.
Double click to expose the nodes and then drag the corners to the edges using the square as a guide.
Nodes dragged and placed
Assembled card with the angled topper.
Here's a selection of completed card fronts
I'd love to see any of your creations using this file
Also take a look at my Facebook page 


No comments:
Post a Comment