Here's my accompanying PowerPoint presentation with notes and findings from the exercise. You will need to watch the tutorial for the notes to make sense. Have a go and let me know how you get on.
Cocopopart tutorial
How to design holly and berries using the Canvas Workspace online programme.
Notes from the Stockport Scan n Cut group 25/10/2018

There are 4 elements to this file. The leaf mat, the leaf topper, the berry mat and the berry topper.
The picture shows the 4 parts and what they look like when assembled.
Open a new project with a blank sheet
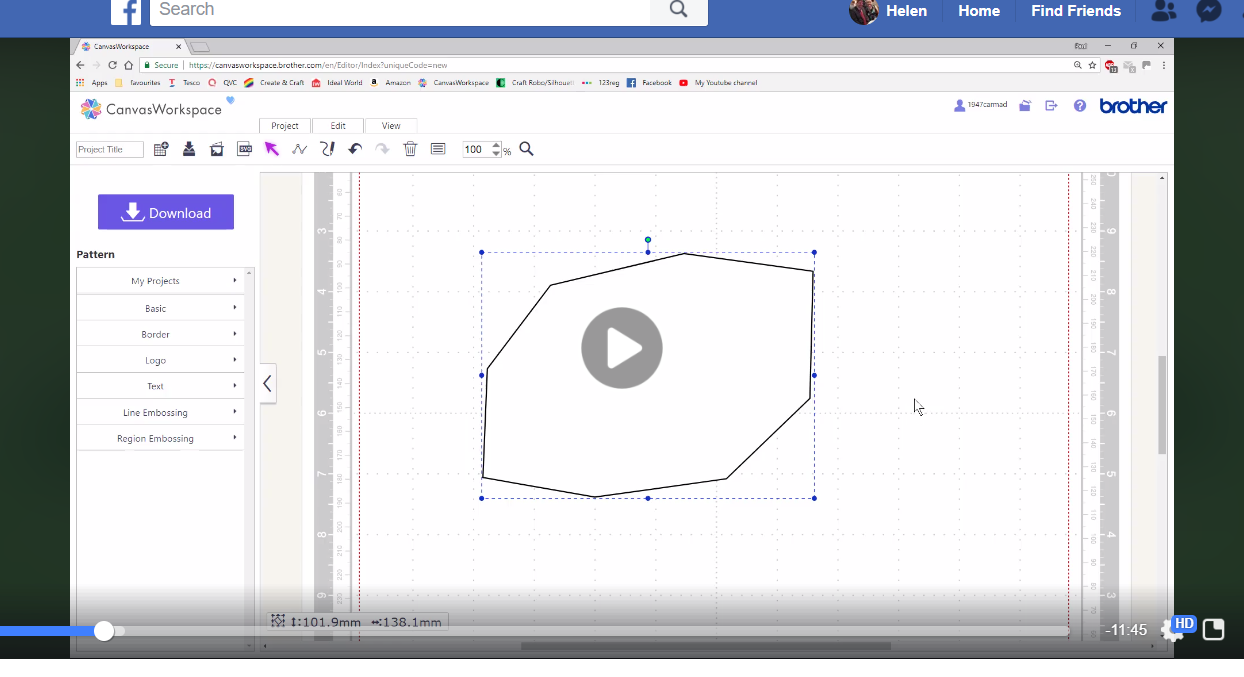
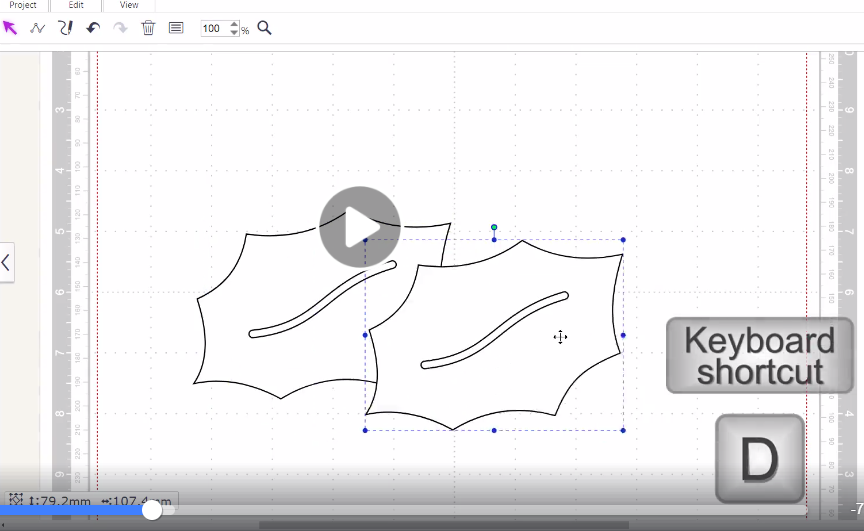
Begin by drawing the first holly leaf
Click on the ‘path’ tool
Click on 8 points and then back on the first point to make a shape similar to this. It is not meant to be a regular shape

Now to change the sides from straight lines to curved ones. Double click on the shape to show the ‘nodes’ and Canvas will highlight one line, a box will appear at the top left of the mat.
NOTE: we struggled in class because I forgot to point out that the control option, circled above, needs to be greyed out, not purple.
If it is purple the adjustment ‘handles’ (little white circles that you drag to change the shape of the line that you are working with) that are either side of a node, are balanced and work equally, so when you drag one, the one on the other side moves in a mirror fashion and this affects the lines either side of the node. If the option is greyed out (click on it when it’s purple to switch to grey) The ‘handles’ work independently of each other so only the highlighted line will be altered.
Change the ‘Straight’ option to ‘Curved’. This gives you 2 handles. Gently move the handles one at a time towards the centre of the shape and the line will curve.
NOTE: In class, everytime we did this some of the lines were already given a curved option and some the straight option. (Goodness knows why!) If you look at the nodes, if it is a blue circle it will be a straight line, if it has a white circle in the middle it is already a curved line.
When you change a straight line to a curved one, 2 white circles (handles) appear in the middle of the line. When you click and drag these you curve the line. Practise pulling this handle around the screen and you will see how it affects the depth of the curve and the position of it.
If the node has the white circle in it, this is the handle so click and drag it jus the same as the ones that start in the middle of the line to create the curve.
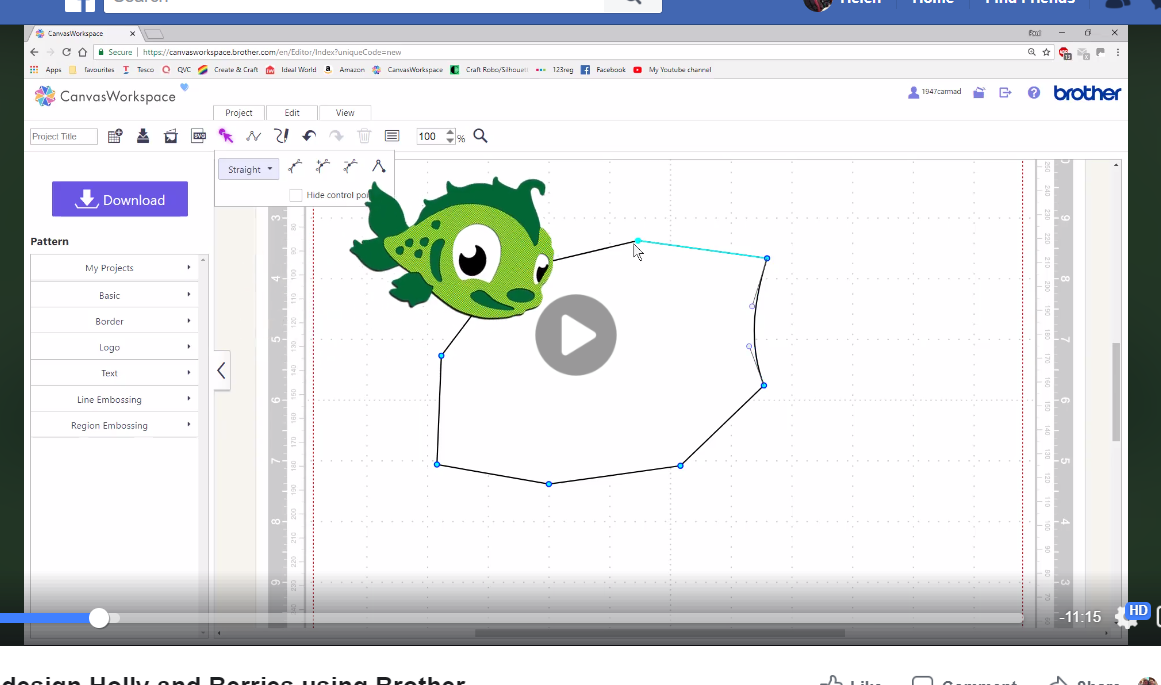
Click on the next node and do the same
When all the lines have been converted to curved and re-shaped you have your holly leaf shape

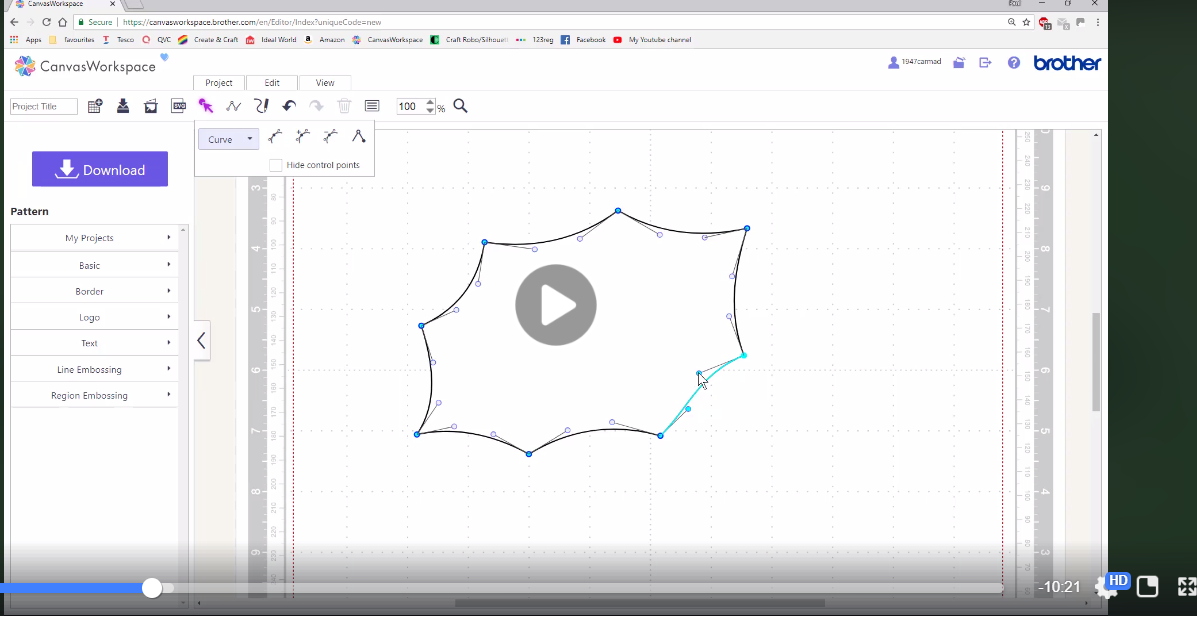
Now to create the vein inside the leaf. Click on the ‘Path’ tool.
Click on 1 point in the centre of the leaf, drag the cursor to where you want the end of the line and click twice (double click) to set the end of the line and then stop it creating any further lines to the shape.
We now need to make this a curved line.
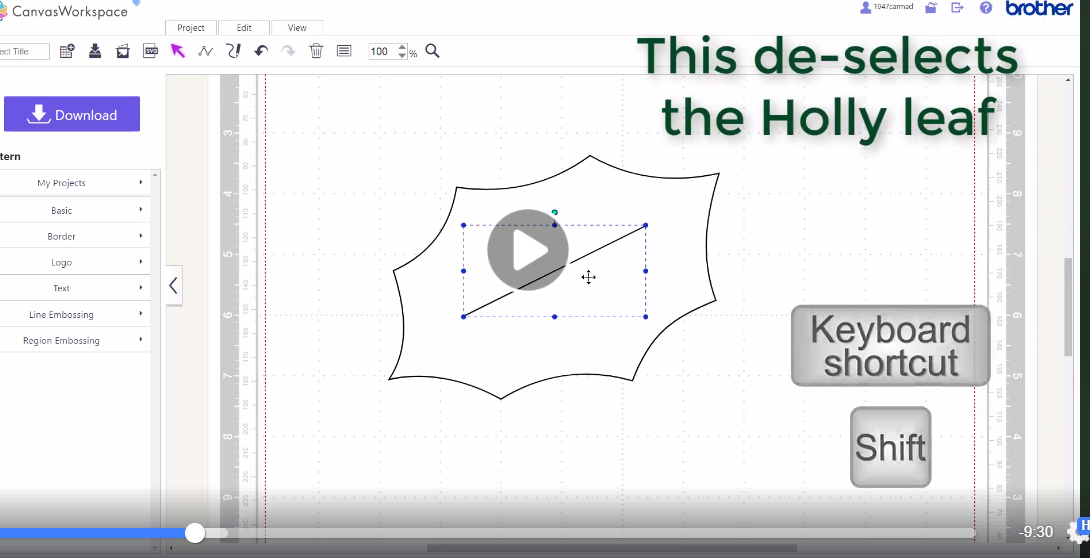
It’s difficult to select a single line so drag an imaginary box around both the leaf and vein to select them both. You will get 2 blue dashed line boxes, one around the leaf and one around the vein. Hold the shift key down whilst you click on the holly leaf shape. This will de-select the leaf and leave the vein highlighted ready to work with.

Click on the second node that you created, as before this highlights the line in blue. Change the line to curve in the box at the top left. Use the handles to create a curved shape, as though the leaf was bent. This will be difficult to see when cut so we need to make it wider.

Select the vein as before. Select EDIT on the tab at the top of the screen. Then select ‘Create Offset Line’, (the icon that looks like 2 circles with an H)

In the dialogue box make the changes as follows. Adjust the offset line in the table. The vein shape needs to be slim so a spacing of 2mm is enough

Now we have a curved vein inside the leaf. Select both shapes (draw an imaginary box around the two parts this will put a blue dashed box around both shapes). You can group them by selecting both shapes and using ‘G’ on the keyboard or clicking ‘EDIT’ and ‘Group’ or you can right click with your cursor on the shapes and choose ‘Group’.
NOTE: In class we realised that by using the ‘G’ keyboard shortcut you have no indication on the screen when you toggle between Group and Ungroup, if you use the EDIT menu or the right click option these will show you only one option. If the option is ungroup, then your shapes are already grouped. If the option is group, then your shapes are not already grouped.
Now to duplicate the shape, use the keyboard shortcut of pressing ‘D’ whilst the shape is highlighted.
NOTE: You also have the option to click on the EDIT menu and then on duplicate (the right hand option in the box with the pair of scissors in), but why would you?
Now to duplicate the shape, use the keyboard shortcut of pressing ‘D’ whilst the shape is highlighted.
NOTE: You also have the option to click on the EDIT menu and then on duplicate (the right hand option in the box with the pair of scissors in), but why would you?
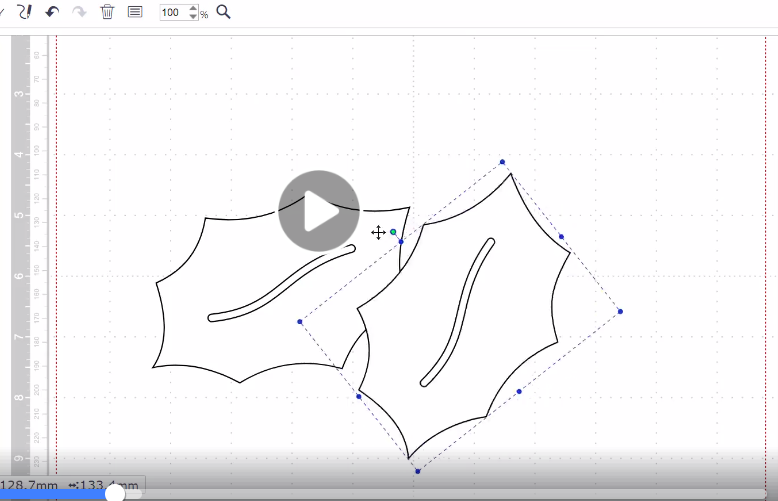
Click on and drag the green circle handle on the box to rotate the shape

Duplicate again for a third leaf. Position the leaves to that they overlap. If you make any mistakes you can use the ‘Undo’ arrow at the top of the screen or use the keyboard shortcut of ‘Ctrl Z’
NOTE: Make sure they overlap well, if you only have the points of the leaves touching the resulting topper will be very fragile.

As a default all the shapes created are coloured white, which shows the hierarchy of the layers. In this exercise we need to see how much things overlap before they are welded so we are going to make them transparent. Click on a shape and open the ‘Properties’ box (the box shape with 3 horizontal lines in it). In the ‘Color’ box you have 2 options, the one on the left is the ‘colour fill’ which is automatically white, and the one on the right is the ‘line’ colour this is automatically black. Change the ‘infill’ box to the checked option, this makes the leaf see through. Click on each of the leaves in turn and change this setting.
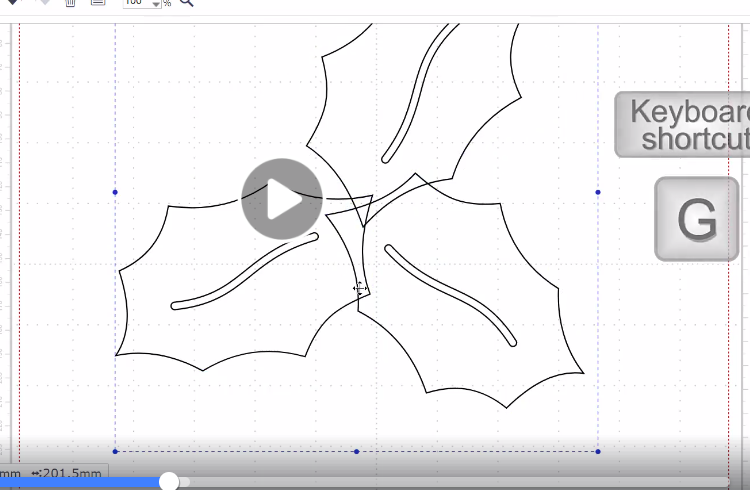
Make sure you have all 3 leaves overlapping. Select all 3 shapes and group them together.
Use the duplicate option of your choice and move one set of leaves to one side.
NOTE: The 2 groups are identical, make sure that you do not move the arrangement so that they will stack up without any overhang when they are cut out. Don’t forget the ‘Un-do’ options if you do nudge them, so you can put it back in place.

Now we are going to weld the shapes on the right, but we need to do a couple of things first. We need to ungroup the 3 leaves. Then was need to ungroup each of the leaves from their vein. Note that the group/ungroup command are both available with the ‘G’ on the keyboard, but the other 2 ways of doing this let you know whether your previous ‘G’ clicks were successful.
NOTE: In class the way that some people created their vein/leaf combination in a different order which will affect how the following steps work. The leaf needs to be behind the vein. Because we have made the leaves see through, if they are on top of the vein we can’t tell. If you colour the leaf (the same way that we changed it to see through) you will see any effects of the layers. TIP: give each leaf a different colour to see the layers, both the leaf and the vein shape will be coloured. If the leaf shape is on top of the vein shape you will not see the vein, in this case moe the leaf shape to the back by right clicking on the shape (after you have ungrouped) and choose the ‘Send to Back’ option. There are some vagaries of and in some circumstances I could not work out what had gone wrong, in this case scrap the topper you’ve been working on and duplicate the one on the right again to start a new one.
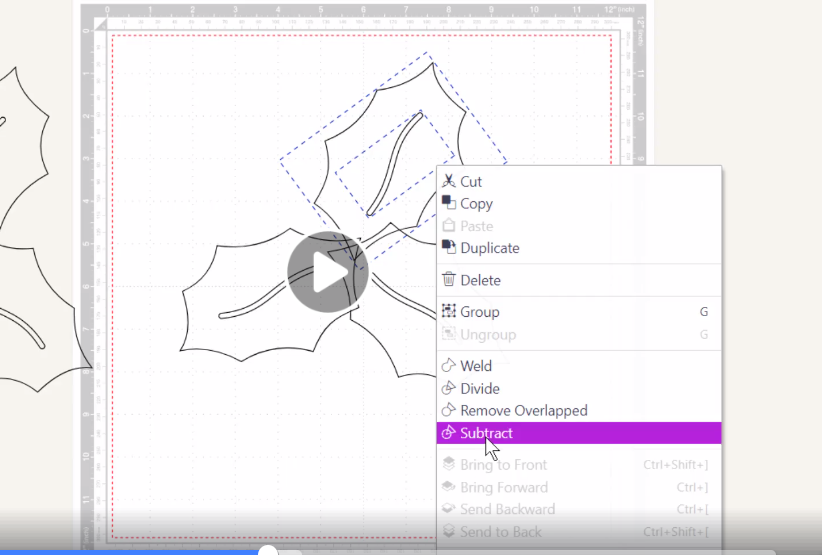
Select one leaf and it’s vein. (See the 2 blue boxes) then right click and select ‘Subtract’. This punches the vein shape out of the leaf shape. Do the same with the other two leaves.
NOTE: the piece you are subtracting, in this case the vein shape from the leaf shape, needs to be on top. Imagine that subtract is like a punch and you are punching the vein shape out of the leaf. The great thing with the ‘Subtract’ option is that it tidies up and gets rid of the piece that you’ve punched out. If you used ‘Divide’ or ‘Remove Overlapped’, you are left with the cut out bit which gets confusing and can cause you to shift things out of place trying to remove it and you don’t want to do this when you need the topper and mat outlines to match.

Select all three leaves and right click and select ‘Weld’. You can also use the ‘Edit’ menu and select ‘Weld’ from there. We will call this the topper.

Because you duplicated the grouped leaves the mat is exactly the same size as the topper.
Again ungroup the 3 leaves, then ungroup each leaf and vein.

Now click on the leaf shapes only, not the vein shapes. Then right click and choose ‘Weld’
NOTE: In class we did a shortcut on this. We didn’t ungroup the individual leaves because when you weld, any shapes in the selected items will weld together, so the vein shapes will be ‘absorbed’ into the shape.

Drag the welded leaf mat away and it will leave the veins. Select the veins and delete them
NOTE: If you did the last step as we did in class, you won’t have the veins to tidy up and delete.

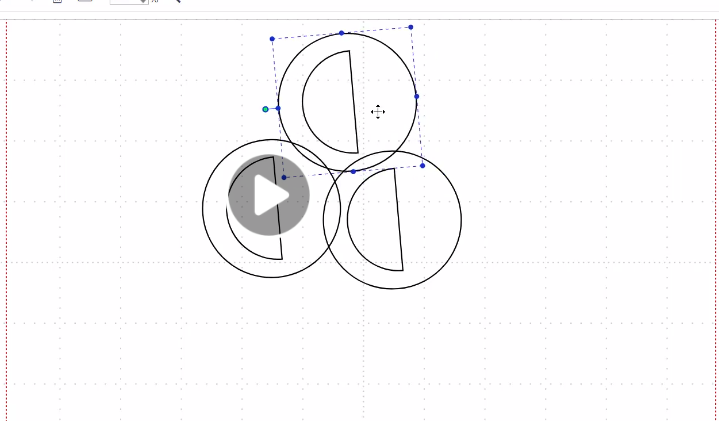
Go into ‘Basic’ shapes on the menu on the left of the screen and drag the circle onto the workspace to create the holly berries.

Drag on the semi circle and re-size it to fit in the circle, this will be a reflection spot. Make sure it’s not too near the top of the circle as we need some substance to the berry edge. You can line up the 2 shapes by selecting them both and choosing ‘Edit’ and ‘Align Centre’
NOTE: In class we just duplicated the circle and made a small one to position at the top instead of the semi-circle to make a reflection spot.

Group these 2 shapes to keep them aligned. Use right click and ‘Group’ from the menu or the keyboard shortcut ‘G’
Just like the holly leaf, rotate the berry, then duplicate it twice and arrange in a group and then select them all and Group together (‘G’ on the keyboard).
NOTE: In class we got some problems with this when it came to the subtract command. It seems like we need to ensure that the reflection point is on a single circle and not over 2 of the berry shapes, so try to make it in this arrangement as in the tutorial.

Create a duplicate so we can have one as a topper and one as a mat for the reflection.

Make the topper as you did the leaves. Ungroup the 3 berries, then ungroup each berry and it’s reflection. Select the berry shape only of each of the 3 shapes and weld.
In this demo there is a space in the middle of the 3 berries which will become an error message when you try to export it so this needs removing. Zoom into the middle so we can see the piece up close.
NOTE: In class we did not do this operation but it is well worth while.

Double click on the shape to show the nodes. Drag an imaginary box around the shape to select the nodes and click on the minus signed curve on the box at the top. This will delete the shape. Click on the ‘View’ menu and then ‘Fit to Mat’ to get out of the zoom mode.

Group the berries shape and the reflections.
NOTE: You can just leave this as a group if you like. This is a mat with the 3 reflection points on top, you could choose to subtract these from the berry mat like we did with the vein from the leaf.
Create the Mat the same was as you did with the leaves. Ungroup all the berries. Ungroup each berry and reflection. Select the berry shapes only and ‘Weld’. Move the berry shape and delete the reflections.
NOTE: IN class we just chose to select all the shapes on the mat and Weld as all the shapes in the selected area are ‘absorbed’ into the outline.

It is likely that your berries are not in proportion to the leaves. Select the berry mat and topper, go to the ‘Edit’ menu and choose ‘Align’ centre and then again to select ‘Align’ middle and group, to hold them together to resize them. Place the berries over the leaves and resize them to suit. When you are happy with the size move the berries away and ungroup them.

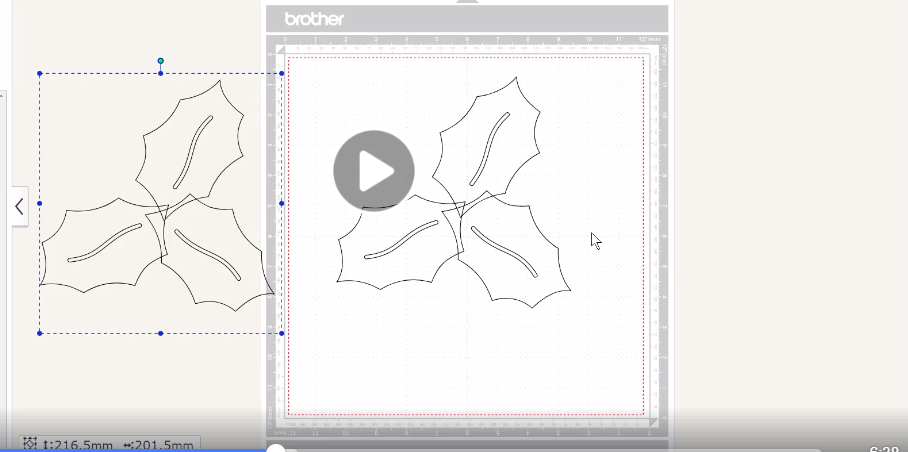
You now have 4 pieces the holly leaf topper, holly leaf mat, berry topper and berry mat. If you want to resize the shapes select them all and group and then resize to the required dimensions. Cut and create!
No comments:
Post a Comment